
Tutorial
Any Video Converter Ultimate for Mac is an all-in-one video converter, which could convert videos from more than 120 kinds of video formats into compatible formats with different devices.

1. How to Convert Video to Other Video Formats?
Add Videos
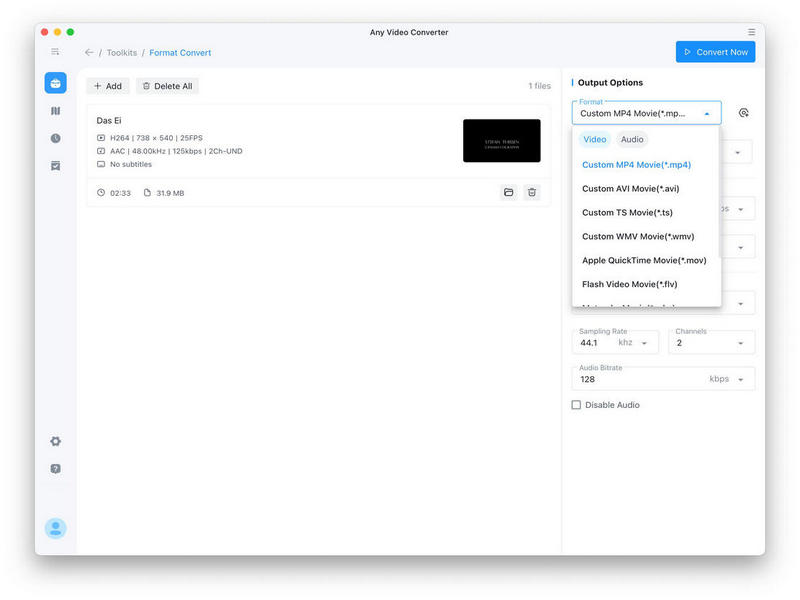
Go to the "Format Convert" panel convert videos. Click on the "+ Add Video" or drag and drop to directly select the files you want to import.
Tips: This powerful Video Converter supports all popular video formats including FLV, MPEG1, MPEG2, MP4, 3GP, 3G2, MOV, AVI, M2TS, MPEG TS/TP (for HD Video) etc.

Set the Output Format
Select your target video/audio format in the "Output Options" on the right. You can adjust Video/Audio Encode, Video Resolution and Quality, and even add your own presets.
Start the Conversion
Click the "Convert Now" button and wait for the conversion. When you're done, you can check immediately, or it can be found in History or Task Queues.
Tips: The default path is / Users/ user/ Movies/ Any Video Converter, click Settings could change the path under File Save Location.
2. How to Download Videos?
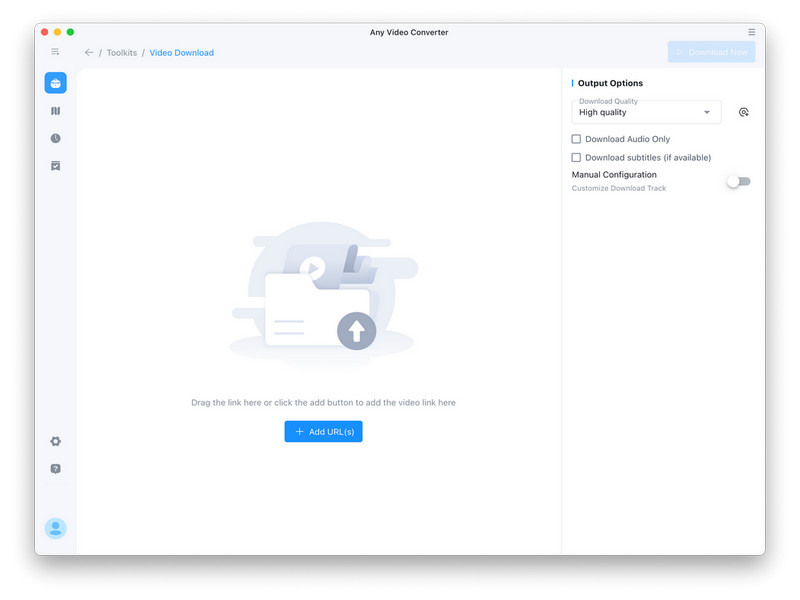
Add URL(s)
Go to copy and paste the video link into this blank space, then click Analyze.
Adjust Output Settings
You can adjust Download Quality in the upper-right area from low to high quality, or download audio/subtitles only.
Download Now
Click on the button "Download Now" in the upper right corner and wait a while to view.
 Hot Products


Hero Products

Highly Recommended
AVCLabs Video Blur AI
Video blur and face blur app to blur background, faces or any part of a video.
View Details FAQ