


How to Make A Blurry Video Clear on Desktop, Mobile, and Online
"How do you make a blurry video clear on iPhone, Android, Mac, and Windows PC? Is there an app to make blurry videos clear?" - Matt Ginnity
There are various reasons that could cause video blurry and the main reasons are low resolution, different encoding, poor light and shaky videos. Here we are going to talk about 4 effective ways on how to make a blurry video clear on iPhone, Android, Mac, Windows PC or online for free and sharpen video quality. Now, let's get started.
- • Part 1: How to Make A Blurry Video Clear on Mac/Windows PC via AVCLabs Video Enhancer AI
- Video Tutorial: Make A Blurry Video Clear Using AVCLabs Video Enhancer AI
- • Part 2: How to Make A Blurry Video Clear on iPhone
- • Part 3: How to Make A Blurry Video Clear on Android
- • Part 4: How to Make A Blurry Video Clear Online for Free
- • Part 5: 5 Tricks to Make A Blurry Video Clear
 Part 1: How to Make A Blurry Video Clear on Mac/Windows PC via AVCLabs Video Enhancer AI
No matter whatever the reason behind the blurry video issues, you are able to easily unblur a video by using the AI video enhancement tool such as AVCLabs Video Enhancer AI.
As a professional AI-based video enhancement tool and AI video upscaling tool, AVCLabs Video Enhancer AI aims to upscale low-res videos like SD (480p), HD (720p) to 1080p or 4K, even up to 8K and improve low-quality videos to better quality with true details preserved. Driven by AI technologies and powerful algorithms, it helps to remove all video blur such as blurry faces in videos and video noiseautomatically and intelligently. No advanced video editing skills are required.
Video Enhancer AI
- Enhance the video quality automatically.
- Upscale videos from SD to HD, HD to 4K.
- Convert video to 60, 90 and even 120 FPS.
- Sharpen faces from blurry video.
- Colorize B&W videos to make revive again.
- Support GPU & TensorRT acceleration.

Let's follow the tips below to fix blurry videos on Mac and Windows PC.
Install and Run AVCLabs Video Enhancer AI
Warm tips: you can click here to check whether your CPU or GPU is capable of clearing a blurry video with AI.
Firstly download the AVCLabs Video Enhancer AI from the above button and install it on your Windows PC or Mac, then double-click on the icon to launch it.
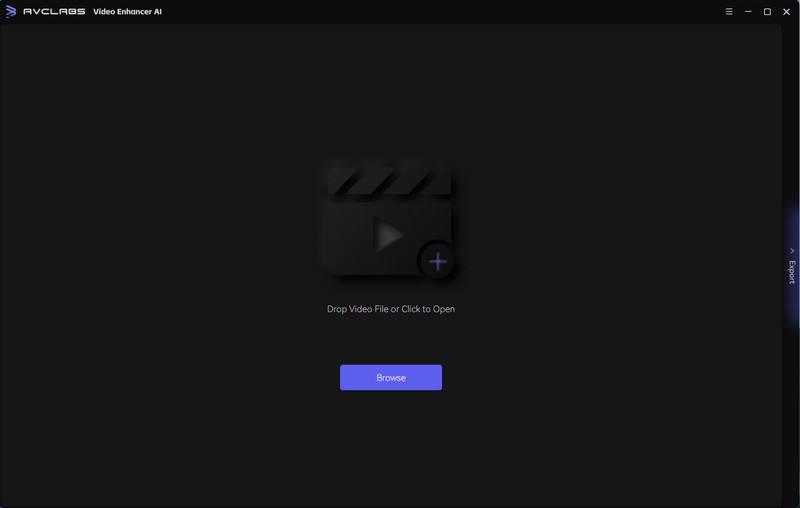
Import the Blurry Video You Wanna Fix
Simply drag & drop the blurry videos from your computer to the program. You can also click on the Browse button at the bottom of the program interface and upload the video file you need to improve from the computer.
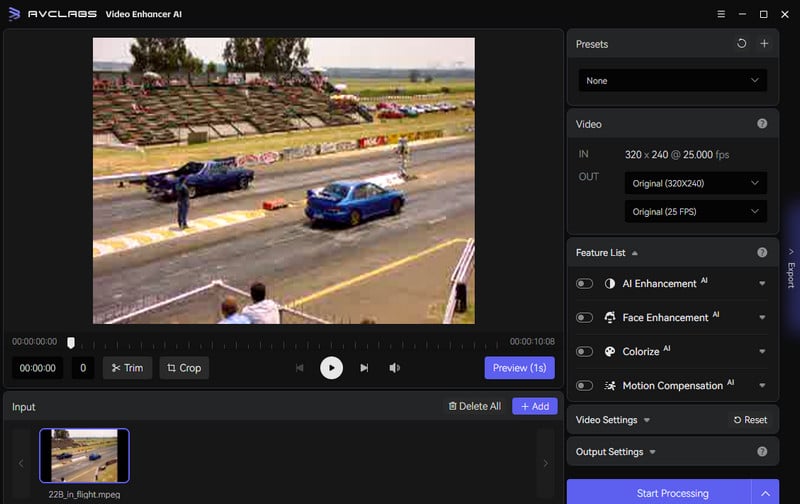
Select the Processing AI Feature and Set the Output Parameters
Before sharpening the blurry video, you are suggested to modify some critical parameters like AI model, output resolution, output format and output path.
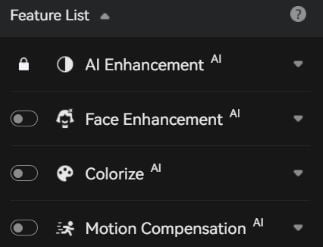
In the right panel of the program, you can choose the AI Feature you prefer. For the portrait-style footage in your video, you also can enable Face Enhancement to detect and enhance every face detail to make your subject look great to process with other AI features.
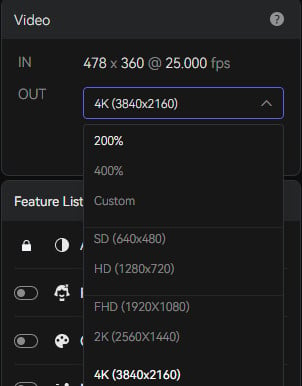
Under the Video menu, set the output resolution to 200%, 400%, SD, HD, 4K UHD, 4K, or 8K. Leave the FPS to default value if you don't need to change it.
If you want to adjust video’s brightness, saturation, contrast, and sharpness, click on Video Settings. Options for cropping to fill the frame and deinterlacing are also available.
Set the output video format (MKV, MP4, AVI, MOV, WEBM), the encoder (H.264, H.265, VP9 Good, VP9 Best, AV1), the bitrate, audio settings, and output path under Output Settings menu.
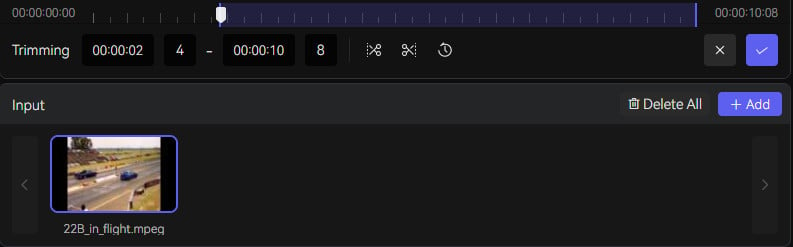
Trim the Output Video
If you just wanna fix a clip of a blurry video, you are able to trim the unwanted parts frame by frame to save processing time. At the bottom of the program, you can trim your video to the desired length by dragging the slider bar. Or input the start and end of the frames to set a clipping point accurately.
Note: You can also crop the video to fit specific aspect ratio or simply remove the unnecessary area of the video.
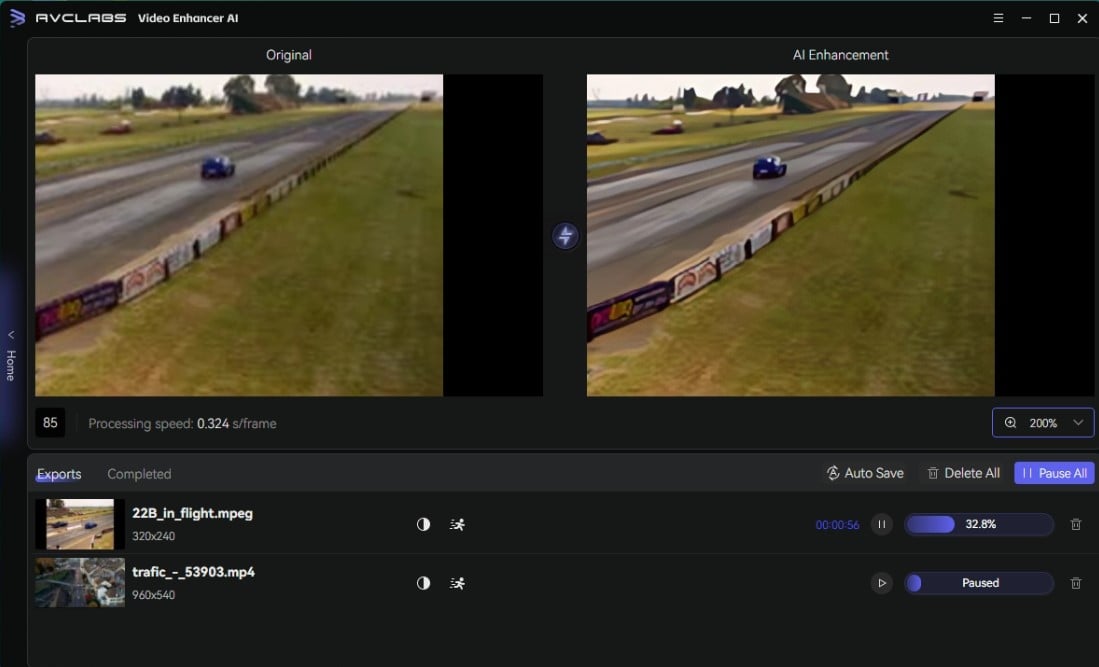
Start Making A Blurry Video Clear Automatically
After all the preparation work is done, simply click on the Export button to start improving your blurry video automatically. The final processing time depends on your computer's system configuration, video size. Please be patient.
After the video unblurring process is completed, you can click on the "Open Output Video" button to check the output clear video.
Video Tutorial: Make A Blurry Video Clear Using AVCLabs Video Enhancer AI
Part 2: How to Make A Blurry Video Clear on iPhone
How to make a blurry video clear on iPhone is one of the popular discussions on the Internet forum. Unfortunately, there’s no native sharpening tool for iOS devices in iMovie. You can use another third-party app like InShot Video Editor to sharpen the blurry video on iPhone.
1. Open the app and upload a blurry video.
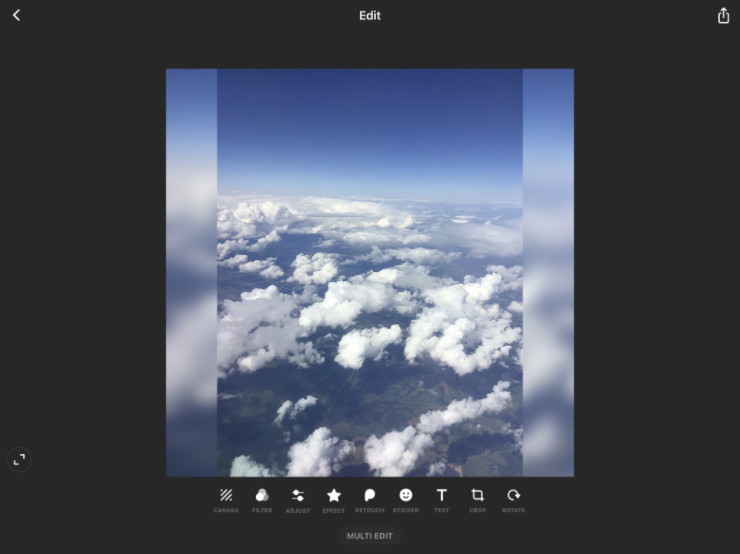
2. Tap the Adjust option to see the full range of available effects.
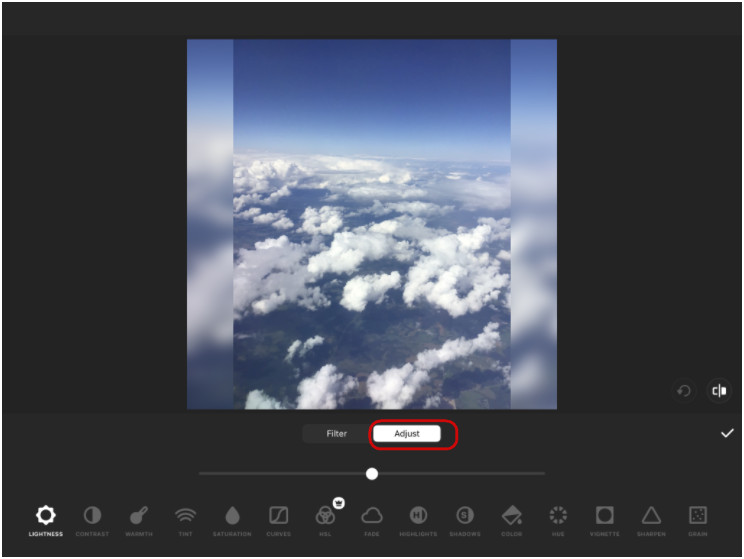
3. Choose the Sharpen option.
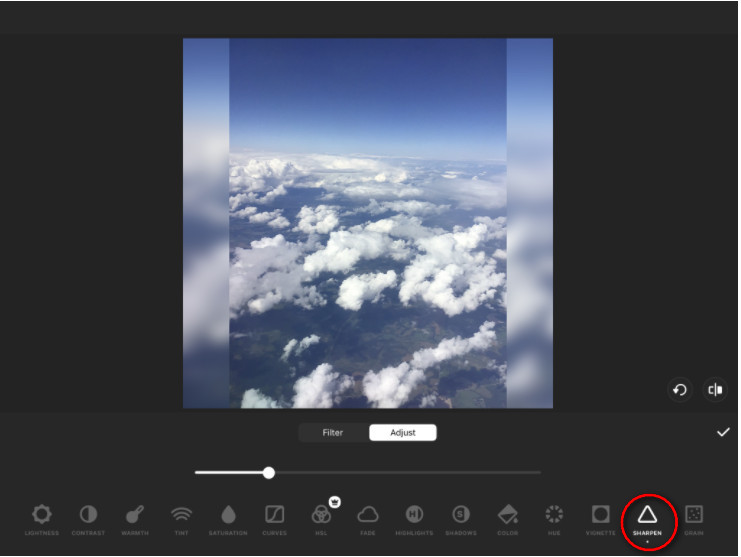
4. Regulate the intensity of the effect.
Part 3: How to Make A Blurry Video Clear on Android
Several steps are helpful to fix blurry videos on an Android device. You can follow these steps below to fix blurry videos on your Android phone.
Solution 1. Restart the Device
By restarting the device, we can fix these issues. So if you see blurry videos problem, you can try to restart your phone. But this step is not an exact solution. Then follow the other steps.
Solution 2. Force Stop Camera App
Another easy solution for blurry video is to force top your camera app.
Simply go to the Settings > Apps option. Under this option, you will see the Application Manager. Here search for the Camera app. Then click the Force Stop to stop the app. Now open the camera app and then see if the blurry videos are continued or are fixed.
Solution 3.Reboot the Device to Safe Mode:
If the problem is with the camera then try to boot your device in safe mode. Maybe doing this can solve the issue you are coming across.
Hold the power key of your device. Here, you will get some power options. You have to tap the Power off and tap it frequently until a popup appears saying “Reboot on the Safe Mode”. Then click on the OK. After restart, now try to see whether there is any blurry video problem or not.
Part 4: How to Make A Blurry Video Clear Online for Free
If your video footage has some blurriness and you want to get rid of it without the to-be-installed app, then you can make a blurry video clear online free with Flixier Video Clearer. Flixier Video Clearer is an online tool that helps you to clear your blur videos. It is a free online tool where one can go and clear any type of blurry video.
Here are the simple steps to fix blurry video online free with Flixier Video Clearer.
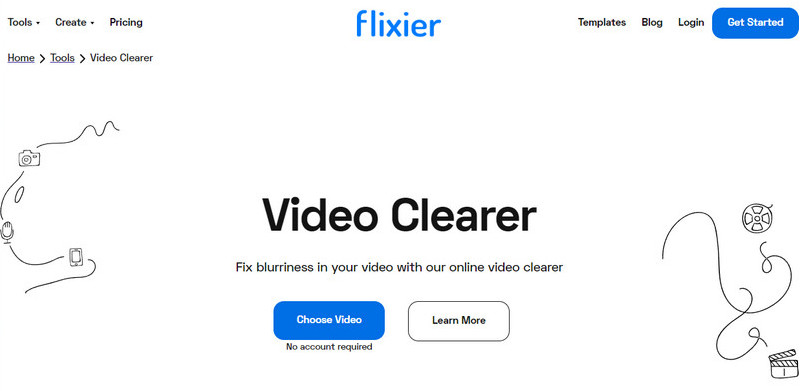
Upload Your Blurry Video Clip
Go to the Flixier Video Clearer website and hit the Choose Video button. You can upload a video that has any blur from a computer, mobile phone, Google Drive, Dropbox, or OneDrive you’d like to clear up.
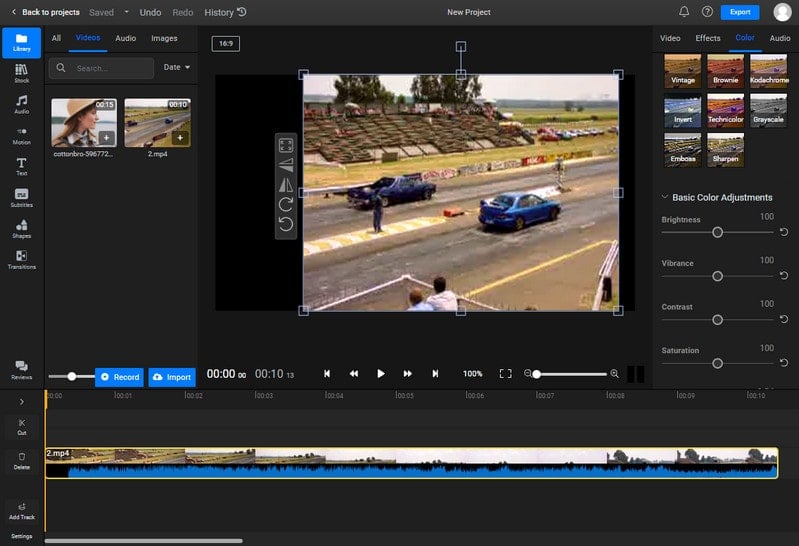
Start to Fix the Blurry Video
Once your blurry clip has been uploaded, drag the video to the timeline first. You will see different options to clear your video. Here you can go to the Color menu and scroll down to Basic Color Adjustments, and then adjust brightness, vibrance, contrast, saturation, and hue rotation. To get rid of any blurriness on the video, you are suggested to up the brightness level and bring the contrast down a bit. It won’t solve all your problems if your video is extremely out of focus, but it will definitely help clever things up a little.
Save the Clear Video
When you're happy with your adjustments, click the Export button to save the video.
Part 5: 5 Tricks to Make A Blurry Video Clear
Now let's view some tips to avoid creating blurry videos. Just learn the 5 tricks to make blurry video clear.
1. Check the focus.
Calibrate your lens and make sure the autofocus functions the way you expect it to.
2. Use additional equipment.
Lenses for landscape photography elevate the overall quality of your clip, additional equipment can help eliminate shaky videos, good lighting facilitates the calibration process.
3. Shoot in well-illuminated places.
Excessive light or darkness both lead to poor color balance and vague parts in video clips. Find the balance before recording a video.
4. Enable high resolution.
Make sure your camera does not use lower resolution settings by default. Configure resolution to enhance the video quality. You should record all the videos in high quality. Shooting videos in high quality, like 720p, 1080p, or ultra HD format, provides crystal clear, life-like visuals.
5. Clean the lens of the camera.
If you do not want to get blurry videos, you must wipe off the camera lens properly. Clean your lens with a specialized wet wipe to avoid blurriness.
Conclusion:
That's all about how to fix blurry videos on iPhone, Android, Mac, Windows PC and online for free. Making a blurry video clear can be easy with the help of tools and tricks. With AVCLabs Video Enhancer AI, Mac/Windows PCs users can bring life to their video clips. With this program’s powerful AI algorithm, users can reap the benefits of the program’s advanced abilities, like auto-enhancement of video quality, color correction, and sharpening capabilities. iPhones and Android users also have options to make a blurry video warn when need be. Additionally, non-professionals can take advantage of online free solutions as well.
Last but not least, follow the five tricks outlined for clearer videos and great memories that won't have to just live in our minds! Whether you are using a PC, Mac, smartphone, or want an online video clearer, you can find a suitable solution in this article. Hopefully, you have learned how to make a blurry video clearer. Now you're ready to make your own sharp and clear videos that will look polished and professional!
Try AVCLabs Video Enhancer AI to breathe new life into your footage!

Related Articles & Tips
- • Best 10 AI Video Editor to Edit Videos Automatically
- • How to Make Your Videos Less Blurry Like a Pro
- • Top 5 Video Clarity Increasers to Improve Video Quality
- • [Most Effective Way] How to Make a Video Clearer
- • Top 3 Video Quality Enhancers to Make a Video Higher Quality
- • Solved! Full Guide on How to Fix Blurry Videos Sent to Me
 AI Products


Hero Products


Video Converter
- MP4 Converters
- MKV to MP4 Converters
- AVI To MP4 Converters
- MOV to MP4 Converter
- Best Free AV1 Converters
- HEVC/H.265 Converter
- H.264 Video Converter
- Android Video Converter
- Samsung Video Converter
- Sony PS4 Video Converter
- Nokia Video Converter
- MPEG Video Converter
- Convert 4K to 1080P
- Convert MP4 to MP3
- Convert M2TS to MP4
- Convert MVI to MP4
- Convert WebM to MP4
- Convert Videos to MP3
- Convert MP4 to 3GP
- Convert M4V to MP4
DVD Converter
Video Editor
- Best AI Video Editors
- Free AI Video Generators
- Best AI Slideshow Makers
- Replace Face in Video
- AI Cartoon Video Generators
- Text-to-Video AI Generators
- Best Free Voice Changers
- Text-to-Video AI Generators
- Sites to Download Subtitles
- Add Subtitles to Video
- Free Online Video Compressor
- Convert Your Videos to GIFs
- Blur Video Backgrounds
- Video Editing Apps for YouTube
Video Enhancer
- Best 10 Video Enhancer
- Improve Video Quality
- Fix Blurry Videos
- Remove Noise from Footage
- Upscale Video from HD to 4K
- Upscale Video from 480P to 1080P
- Best AI Video Upscaling Tools
- Make a Blurry Video Clear
- Best Old Video Restorer
- How to Sharpen Video
- Fix Bad Quality Videos
- Increase Video Resolution
- Convert Videos to 4K
- Upscale Anime Videos to 4K
Photo Enhancer
- Fix Blurry Pictures Online
- Make Blurrys Picture Clear
- Increase Image Resolution Online
- Remove Blur from Images
- AI Image Sharpener Online
- Topaz Gigapixel AI Alternatives
- Fix Low-resolution Photos
- Colorize Historical Photos
- Remove Noise from Photos
- AI Image Sharpener
- AI Face Retoucher
- AI Image Enlargers
Mobile & PC
